Creating a Campaign
A campaign groups tracked links, budget, and attribution around a single marketing push — everything launched under it rolls up into one view. You build one in the dashboard through a four-step wizard: Details → Budget → Links → Review. You can Save Draft at any step and finish later.
Step 1 — Details
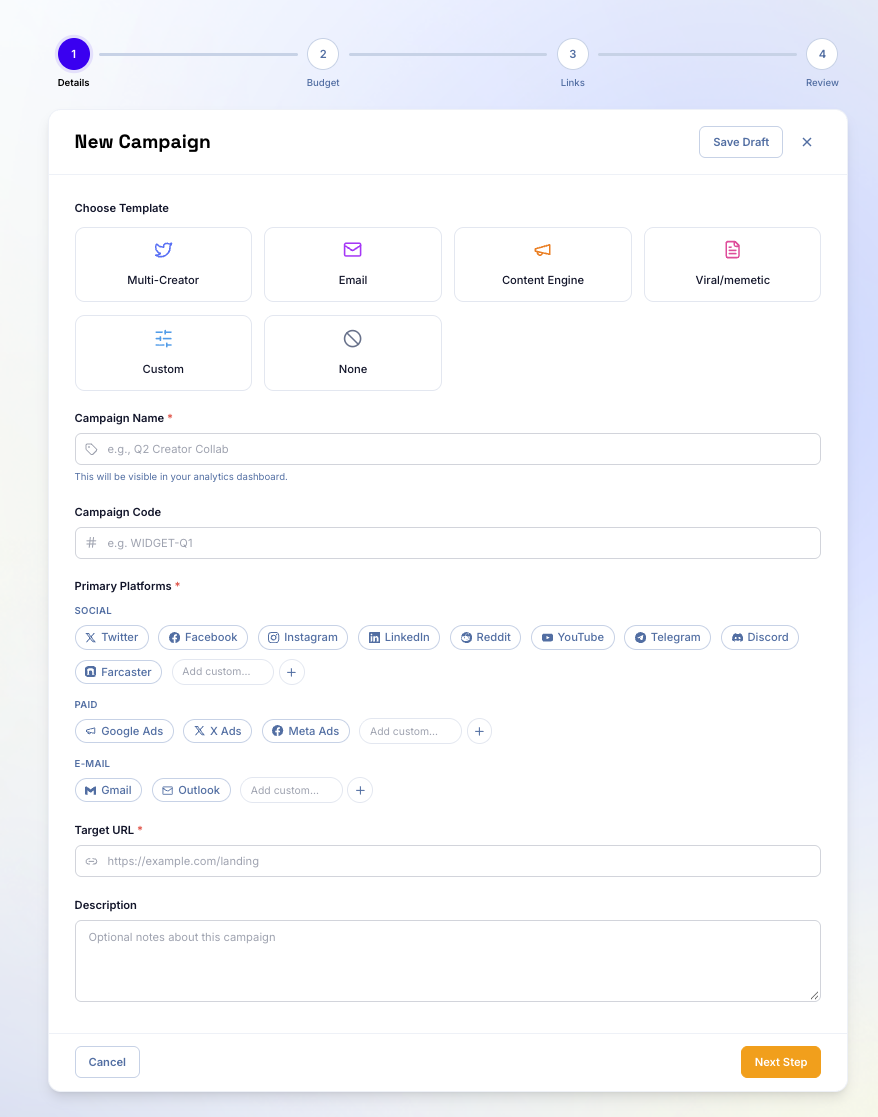
Choose a template to pre-fill a common campaign shape, or start from scratch:
| Template | For |
|---|---|
| Multi-Creator | A push run across several creators / influencers |
| Email-led campaigns | |
| Content Engine | Ongoing content distribution |
| Viral / memetic | Social-first, meme-driven pushes |
| Custom | Configure everything yourself |
| None | Start from a blank campaign |
Then fill in:
- Campaign Name (required) — shown throughout your analytics dashboard.
- Campaign Code (optional) — a short reference code, e.g.
WIDGET-Q1. - Primary Platforms (required) — where the campaign runs, grouped into:
- Social — Twitter/X, Facebook, Instagram, LinkedIn, Reddit, YouTube, Telegram, Discord, Farcaster (plus Add custom).
- Paid — Google Ads, X Ads, Meta Ads (plus Add custom).
- Email — Gmail, Outlook (plus Add custom).
- Target URL (required) — the default destination for the campaign (e.g. your landing page).
- Description (optional) — notes about the campaign.
Step 2 — Budget
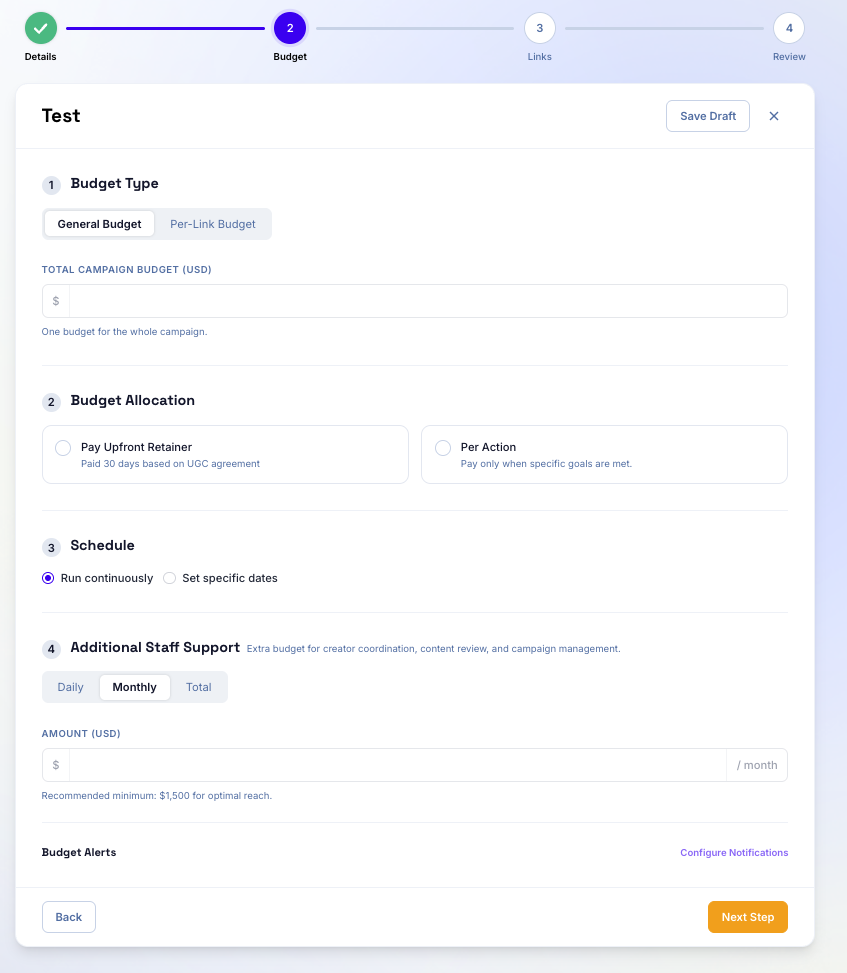
- Budget Type
- General Budget — one budget for the whole campaign.
- Per-Link Budget — budget set per tracking link.
- Total Campaign Budget (USD).
- Budget Allocation
- Pay Upfront Retainer — paid over 30 days based on a UGC agreement.
- Per Action — pay only when specific goals are met.
- Schedule — Run continuously, or Set specific dates.
- Additional Staff Support (optional) — extra budget for creator coordination, content review, and campaign management. Enter an amount billed Daily / Monthly / Total (recommended minimum ~$1,500/month for optimal reach).
- Budget Alerts — Configure Notifications to be warned as spend approaches your budget.
Step 3 — Links
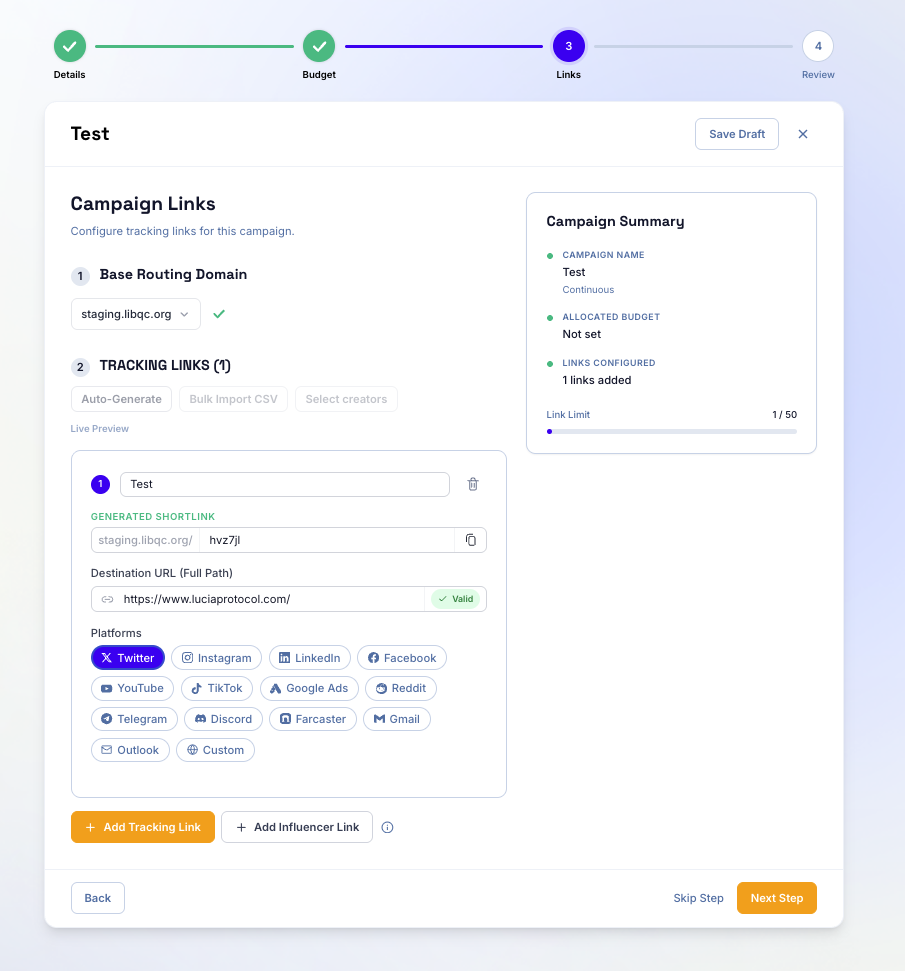
Configure the tracking links that attribute traffic to this campaign.
- Base Routing Domain — the short domain your links are served from (e.g.
staging.libqc.org). - Tracking Links — add them manually, or use Auto-Generate, Bulk Import CSV, or
Select creators. Each link has:
- A name.
- A generated shortlink (e.g.
…/hvz7jl) — copy and share this; clicks on it are attributed to the campaign. - A destination URL (full path) — validated as you type.
- Platforms — tag which platform(s) the link is for: Twitter, Instagram, LinkedIn, Facebook, YouTube, TikTok, Google Ads, Reddit, Telegram, Discord, Farcaster, Gmail, Outlook, or Custom.
- Add Influencer Link — add links attributed to a specific creator / influencer.
- A campaign holds up to 50 links (watch the Link Limit meter), and the Campaign Summary panel tracks the name, allocated budget, and links configured as you go.
You can Skip Step and add links later.
Step 4 — Review & Launch
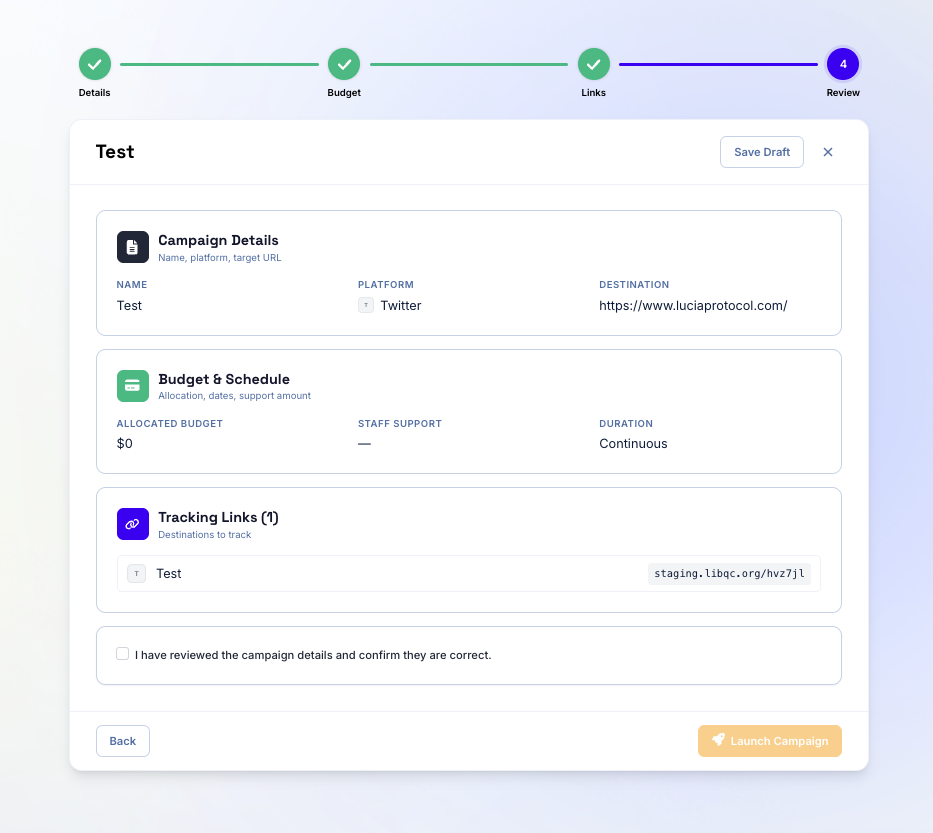
Review the summary — Campaign Details, Budget & Schedule, and Tracking Links — tick "I have reviewed the campaign details and confirm they are correct," and Launch Campaign.
Once live, every tracking link in the campaign starts resolving clicks and conversions back to it. Read the results in the dashboard and the Attribution API, and act on them with the strategies in Increasing Conversion Rates, ROMI, and Organic Campaigns.
Campaign tracking links attribute inbound traffic (the click that brought someone in). The browser SDK captures what happens on your site afterward (pageviews, conversions, wallet connects). Together they close the loop from first click to conversion. See Links and Campaigns and Link Generation for more on links.